超訳 Xamarin の概要
Microsoftのページって個人的に理解する為に、ワンクッションおくことが多いです。
色々読みながら、で結局どうなの?ってのにたどり着くまで結構時間かかること多いんですよね。。。
これは、単純に筆者のスキルレベルのせいだと考えてます。
なので、筆者的に理解した翻訳を残しておこうというメモ。的なエントリです。
今回訳してみたページ
Xamarin の概要の超訳。
Xamarin.Forms は、iOS、Android、Windowsで動くプログラムを作成するときの一つの選択肢。
という1行にまとまりました。 このドキュメントから私が理解できたことは。この1行です。
ドキュメントに記述されている概要
Xamarin.Forms は、iOS、Android、ユニバーサル Windows プラットフォーム アプリ間で共有可能なネイティブ ユーザー インターフェイス レイアウトを効率的に作成するための、開発者向けクロスプラットフォーム UI ツールキットです。
キーワードの略を記述
| キーワード | 意味 |
|---|---|
| iOS | iPhoneのOS(オペレーティングシステム) |
| Android | スマホのOS(オペレーティングシステム)のこと |
| ユニバーサル Windows プラットフォーム(UWP) | 異なるデバイス向けに提供されるMicrosoft Windows用のアプリケーションソフトウェアを共通の基盤上で動作させることのできる、統合されたプラットフォーム |
| ネイティブ ユーザー インターフェイス レイアウト | iOS向け、andorid向けにそれぞれUI(ユーザーインターフェース)を構築するコンポーネントがあるが、これらコンポーネントを利用して作成したレイアウトのこと |
| クロスプラットフォーム | 異なるプラットフォーム上で、同じ仕様のものを動かすことが出来るプログラムど土台のこと |
| UI ツールキット | UIを構築するための道具一式のこと |
| ユーザーインターフェース | 機械、特にコンピュータとその機械の利用者との間での情報をやりとりするためのインタフェース(入出力部分) |
| プラットフォーム | システム・サービスを動かすための基盤(土台となる環境) |
| Xamarin | .NET を使用して、iOS、Android、Windows 向けのアプリケーションをビルドするためのオープンソースのプラットフォーム |
| オープンソース・ソフトウェア | ソースコードを商用、非商用の目的を問わず利用、修正、頒布することを許し、それを利用する個人や団体の努力や利益を遮ることがないソフトウェア |
英語ドキュメントを翻訳
Xamarin.Forms is a cross-platform UI toolkit that allows developers to efficiently create native user interface layouts that can be shared across iOS, Android, and Universal Windows Platform apps.
DeepLでの翻訳
Xamarin.Forms は、iOS、Android、Universal Windows プラットフォームのアプリ間で共有できるネイティブのユーザーインターフェイスレイアウトを効率的に作成するためのクロスプラットフォーム UI ツールキットです。
Googleでの翻訳
Xamarin.Formsは、開発者がiOS、Android、およびユニバーサルWindowsプラットフォームアプリ間で共有できるネイティブユーザーインターフェイスレイアウトを効率的に作成できるようにするクロスプラットフォームUIツールキットです。
Wikipediaを覗いておく
XAMLベースのクロスプラットフォームなGUIアプリケーションフレームワーク。
感想
Xamarin.Formsって割と嫌われてる?
よくあるネットの意見
- 原因の切り分けが難しそう。
- Xamarin.Forms自体のバグを踏みそう。
xamarin.iOSでHTTP Clientする場合はNSURLConnectionを利用するべき。
今日もプログラムは書いてません。
昨日のエントリのmonotouch-samplesのHttpClientを見てみる。にあるサンプルで分かったことがある。
xamarin.iOSでHTTP Clientする場合はNSURLConnectionを使いましょう。
理由:WebRequestだとプロキシ経由のアクセスができない。
public partial class AppDelegate : UIApplicationDelegate{
    //~~省略~~
    void Button1TouchDown (object sender, EventArgs e){
        //~~省略~~
        new Cocoa (this).HttpSample ();
        //~~省略~~
    }
    //~~省略~~
}
public class Cocoa : NSUrlConnectionDelegate{
    AppDelegate ad;
    byte [] result;

    public Cocoa (AppDelegate ad){
        this.ad = ad;
        result = new byte [0];
    }
    public void HttpSample (){
        //NSUrlRequestの第2引数にキャッシュの設定してる。
        var req = new NSUrlRequest (new NSUrl (Application.WisdomUrl), NSUrlRequestCachePolicy.ReloadIgnoringCacheData, 10);

        //HTTPを叩く処理第2引数のデリゲートに自分自身を渡す(Cocoa : NSUrlConnectionDelegate)
        NSUrlConnection.FromRequest (req, this);
    }
    // HTTPを叩いた時のデータを受け取る関数(Objective-CのdidReceiveDataラップで複数回呼ばれるそう。)
    public override void ReceivedData (NSUrlConnection connection, NSData data){
        byte [] nb = new byte [result.Length + data.Length];
        result.CopyTo (nb, 0);
        Marshal.Copy (data.Bytes, nb, result.Length, (int) data.Length);
        result = nb;
    }
}
ReceivedDataはどうも、適当な頻度で必要な回数呼ばれるみたい。 最初にReceivedResponseが呼ばれて、ReceivedDataが何度か呼ばれるみたいです。 近いうちにConsole Output(NSLog)して確認しなくっちゃweb利用したアプリ作れないですね。
WebRequestでプロキシ経由のアクセスできれば超簡単なはずなんだけどもね。
参考: * http://stackoverflow.com/questions/11860218/monotouch-objective-c-iphone-5-x-how-to-cache-web-pages-using-nsurlcache * http://d.hatena.ne.jp/Kmusiclife/20110717/1310908394 * http://docs.go-mono.com/?link=T%3aMonoMac.Foundation.NSUrlConnectionDelegate%2fM * http://d.hatena.ne.jp/It_lives_vainly/20090312/1236855251
monotouch-samplesのHttpClientを見てみる。
今日はあまり時間がとれなく、サンプルを見て実機に転送してみることに。 https://github.com/xamarin/monotouch-samples/tree/master/HttpClient
       public override bool FinishedLaunching (UIApplication app, NSDictionary options)
        {
            window.AddSubview (navigationController.View);

            //ボタンのイベント追加
            button1.TouchDown += Button1TouchDown;

            //UITableViewへ設定(TableViewRocks.csに実装がある)
            TableViewSelector.Configure (this.stack, new string [] {
                "http  - WebRequest",
                "https - WebRequest",
                "http  - NSUrlConnection"
            });

            //レンダリング
            window.MakeKeyAndVisible ();

            return true;
        }

        void Button1TouchDown (object sender, EventArgs e)
        {
            // Do not queue more than one request
            if (UIApplication.SharedApplication.NetworkActivityIndicatorVisible)
                return;

            switch (stack.SelectedRow ()){
            case 0:
                //.netのWebRequestを利用したサンプル(アクセス先はapi.twitter.com)
                new DotNet (this).HttpSample ();
                break;

            case 1:
                //.netのWebRequestを利用したサンプル(https:アクセス先はgmail)
                new DotNet (this).HttpSecureSample ();
                break;

            case 2:
                //CocoaのNSUrlRequestを利用したサンプル(アクセス先はapi.twitter.com)
                new Cocoa (this).HttpSample ();
                break;
            }
        }
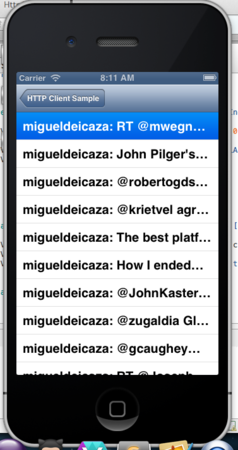
こんな感じのアプリです。 実機に転送してプロキシ環境確認してみよう。
トップページの画面

httpsのサンプル結果

httpのサンプル結果(WebRequestも、NSUrlRequestも結果は同じ)
xamarin.iOSでWebClientを試した。(例外処理対応)
昨日のxamarin.iOSでWebClientを試しただと、通信できない環境でアプリが落ちたので、例外処理を入れて対応。
using System;
using System.Drawing;
using MonoTouch.UIKit;

using System.Net;

namespace UIKitExample
{
    public class UIViewExample : UIViewController
    {

        public UIViewExample ()
        {
            this.View.BackgroundColor = new UIColor (1.0f, 1.0f, 1.0f, 1.0f);

            UILabel uilbl = new UILabel (new RectangleF (10.0f, 10.0f, 300.0f, 30.0f));
            uilbl.Text = "init";

            UIButton uiBtn = new UIButton (UIButtonType.RoundedRect);
            uiBtn.Frame = new RectangleF (10.0f, 40.0f, 300.0f, 30.0f);
            uiBtn.SetTitle("download button", UIControlState.Normal);
            uiBtn.TouchUpInside += (sender, e) => {
                WebClient webClient = new WebClient();
                //try~catchで処理を囲む。
                try {
                    uilbl.Text = webClient.DownloadString(new Uri("http://mitsugeek.net/xamarin/text.txt"));
                } catch(Exception ex){
                    uilbl.Text = ex.Message;
                }
            };

            UIButton uiBtnClear = new UIButton (UIButtonType.RoundedRect);
            uiBtnClear.Frame = new RectangleF (10.0f, 80.0f, 300.0f, 30.0f);
            uiBtnClear.SetTitle("clear button", UIControlState.Normal);
            uiBtnClear.TouchUpInside += (sender, e) => {
                uilbl.Text = "init";
            };

            this.View.AddSubviews (uilbl, uiBtn, uiBtnClear);
        }
    }
}
結果。

NameResolutionFailureというエラーが発生してますね。try~catchで問題なくアプリは落ちなくなりました。
WebRequestの例外はこのへんが役に立つかもしれません。
xamarin.iOSでWebClientを試した。(同期処理の方)
asyncやawaitは使えるのか?と気になり、 async、awaitを利用したDownloadStringTaskAsyncは使えなかった。コンパイル通りません。
DownloadStringAsyncの方はコンパイル通ったんだけども、使い方を間違えているのか動かしてみると、
=================================================================
Got a SIGABRT while executing native code. This usually indicates
a fatal error in the mono runtime or one of the native libraries
used by your application.
=================================================================
となって落ちたので、ひとまず同期処理を試しました。
※このソースのまま動かした場合、オフラインだとアプリが落ちます。
using System;
using System.Drawing;
using MonoTouch.UIKit;

using System.Net;

namespace UIKitExample
{
    public class UIViewExample : UIViewController
    {

        public UIViewExample ()
        {
            this.View.BackgroundColor = new UIColor (1.0f, 1.0f, 1.0f, 1.0f);

            //WebClient確認用のラベル
            UILabel uilbl = new UILabel (new RectangleF (10.0f, 10.0f, 300.0f, 30.0f));
            uilbl.Text = "init";

            //URLを叩いて、取得した文字をラベルに設定するボタン
            UIButton uiBtn = new UIButton (UIButtonType.RoundedRect);
            uiBtn.Frame = new RectangleF (10.0f, 40.0f, 300.0f, 30.0f);
            uiBtn.SetTitle("download button", UIControlState.Normal);
            uiBtn.TouchUpInside += (sender, e) => {
                WebClient webClient = new WebClient();
                uilbl.Text = webClient.DownloadString(new Uri("http://mitsugeek.net/xamarin/text.txt"));
            };

            //ラベルの文字を初期化するボタン
            UIButton uiBtnClear = new UIButton (UIButtonType.RoundedRect);
            uiBtnClear.Frame = new RectangleF (10.0f, 80.0f, 300.0f, 30.0f);
            uiBtnClear.SetTitle("clear button", UIControlState.Normal);
            uiBtnClear.TouchUpInside += (sender, e) => {
                uilbl.Text = "init";
            };

            //コントロールをviewに追加
            this.View.AddSubviews (uilbl, uiBtn, uiBtnClear);
        }
    }
}
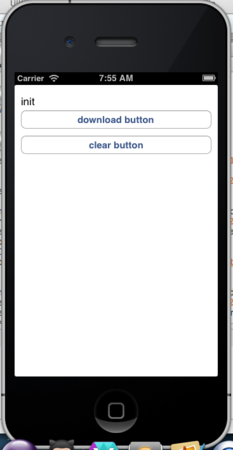
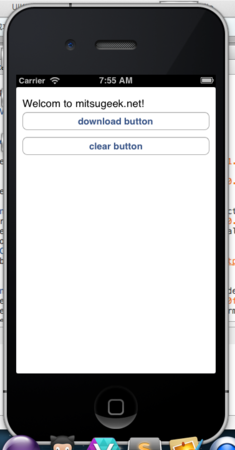
結果は↓の用に。左がボタンを押す前で、右がボタンを押した後です。
非同期処理はどこかのタイミングで調べてみないと。
http://docs.xamarin.com/recipes/ios/network/web_requests/download_an_image を見る限り、非同期メソッドは動くみたい。
一応↓のようにラベルに値をセットするとエラーになるみたいなので、非同期で取得しておいて、どこかのタイミングで取得結果を表示するとかだと上手く行くかも。
using System;
using System.Drawing;
using MonoTouch.UIKit;

using System.Net;

namespace UIKitExample
{
    public class UIViewExample : UIViewController
    {

        public UIViewExample ()
        {
            this.View.BackgroundColor = new UIColor (1.0f, 1.0f, 1.0f, 1.0f);

            UILabel uilbl = new UILabel (new RectangleF (10.0f, 10.0f, 300.0f, 30.0f));
            uilbl.Text = "init";

            UIButton uiBtn = new UIButton (UIButtonType.RoundedRect);
            uiBtn.Frame = new RectangleF (10.0f, 40.0f, 300.0f, 30.0f);
            uiBtn.SetTitle("download button", UIControlState.Normal);
            uiBtn.TouchUpInside += (sender, e) => {
                WebClient webClient = new WebClient();
                webClient.DownloadStringCompleted += (object sender2, DownloadStringCompletedEventArgs e2) => {
                    //↓のコメントを外すとGot a SIGABRTとなる。
                    //uilbl.Text = e2.Result;
                };
                //uilbl.Text =
                webClient.DownloadStringAsync(new Uri("http://mitsugeek.net/xamarin/text.txt"));
            };

            UIButton uiBtnClear = new UIButton (UIButtonType.RoundedRect);
            uiBtnClear.Frame = new RectangleF (10.0f, 80.0f, 300.0f, 30.0f);
            uiBtnClear.SetTitle("clear button", UIControlState.Normal);
            uiBtnClear.TouchUpInside += (sender, e) => {
                uilbl.Text = "init";
            };

            this.View.AddSubviews (uilbl, uiBtn, uiBtnClear);
        }
    }
}
今日はC#でCore Animation。
ネットでみつけた「Core Animationの基礎的なところ」というのをC#に置き換えてみます。
using System;
using System.Drawing;
using MonoTouch.Foundation;
using MonoTouch.UIKit;
using MonoTouch.CoreAnimation;

namespace UIKitExample
{
    public class UIViewExample : UIViewController
    {

        public UIViewExample ()
        {
            this.View.BackgroundColor = new UIColor (1.0f, 1.0f, 1.0f, 1.0f);

            //UIViewのLayerをアニメーション
            UIView uiView = new UIView ();
            uiView.Frame = new RectangleF (0.0f, 0.0f, 100.0f, 100.0f);
            uiView.BackgroundColor = UIColor.Red;
            this.View.AddSubview (uiView);
            CABasicAnimation animation = CABasicAnimation.FromKeyPath ("position");
            uiView.Layer.Position = new PointF (250.0f, 250.0f);
            animation.From = NSValue.FromPointF (new PointF (100.0f, 100.0f));
            animation.To = NSValue.FromPointF (new PointF (250.0f, 250.0f));
            animation.Duration = 1.5d;
            animation.RepeatCount = 1.0f;
            uiView.Layer.AddAnimation (animation, "move");

            //Layerのインスタンスを追加してアニメーション
            CALayer caLayer = new CALayer ();
            caLayer.Frame = new RectangleF(0.0f,0.0f,100.0f, 100.0f);
            caLayer.BackgroundColor = UIColor.Blue.CGColor;
            CABasicAnimation animation2 = CABasicAnimation.FromKeyPath("position");
            caLayer.Position = new PointF(100.0f,100.0f);
            animation2.From = NSValue.FromPointF (new PointF (250.0f, 300.0f));
            animation2.To = NSValue.FromPointF (new PointF (100.0f, 100.0f));
            animation2.Duration = 1.5d;
            animation2.RepeatCount = 1.0f;
            caLayer.AddAnimation (animation2, "move");
            uiView.Layer.AddSublayer (caLayer);
        }
    }
}
UIButtonをクリックしてUIAlertViewを表示。イベントにはラムダ式を利用でコードスッキリ。
今日も朝はiOS(C#)コーディング。
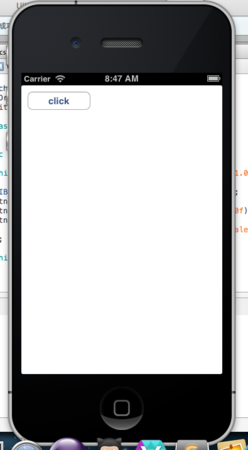
UIControllerにUIButtonを追加してボタンを押すと、UIAlertViewを表示する簡単なサンプル。 イベントの登録にラムダ式を使えるので、コードはとてもスッキリ。
using System;
using MonoTouch.UIKit;
using System.Drawing;
namespace UIKitExample
{
    public class UIViewExample : UIViewController
    {

        public UIViewExample ()
        {
            //背景色設定
            this.View.BackgroundColor = new UIColor (1.0f, 1.0f, 1.0f, 1.0f);

            //UIButton生成
            UIButton btn = new UIButton(UIButtonType.RoundedRect);

            //ボタンのタイトル設定
            btn.SetTitle ("click", UIControlState.Normal);

            //ボタンの表示位置設定
            btn.Frame = new RectangleF (10.0f, 10.0f, 100.0f, 30.0f);

            //ボタンタッチアップ時のイベント
            btn.TouchUpInside += (sender, e) => {
                //UIAlertViewを生成して表示
                new UIAlertView("alert title","alert body",null,"alert button title", null).Show();
            };

            //ボタンをUIViewControllerのViewに追加
            this.View.AddSubview(btn);

        }
    }
}
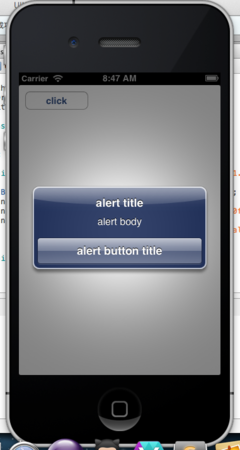
Generic.Dictionaryも使ってみた。
using System;
using MonoTouch.UIKit;
using System.Drawing;
using System.Collections.Generic;

namespace UIKitExample
{
    public class UIViewExample : UIViewController
    {

        public UIViewExample ()
        {
            this.View.BackgroundColor = new UIColor (1.0f, 1.0f, 1.0f, 1.0f);

            Dictionary<String, String> dic = new Dictionary<String,String> ();
            dic.Add ("buttonA", "buttonA Click!");
            dic.Add ("buttonB", "buttonB Click!");
            dic.Add ("buttonC", "buttonC Click!");
            dic.Add ("buttonD", "buttonD Click!");
            dic.Add ("buttonE", "buttonE Click!");
            dic.Add ("buttonF", "buttonF Click!");

            float y = 10.0f;
            foreach (KeyValuePair<String,String> kvp in dic) {
                String buttonName = kvp.Key;
                String buttonClickActionMessage = kvp.Value;

                UIButton btn = new UIButton(UIButtonType.RoundedRect);
                btn.SetTitle (buttonName, UIControlState.Normal);
                btn.Frame = new RectangleF (10.0f, y, 100.0f, 30.0f);
                btn.TouchUpInside += (sender, e) => {
                    new UIAlertView("alert title",buttonClickActionMessage,null,"alert button title", null).Show();
                };
                this.View.AddSubview(btn);
                y += 40.0f;

            }
        }
    }
}
foreachでボタンを配置。

IOS App development of Xamarin Studio 〜 ステータスバーを取り除く
今日の朝チュートリアルは、「書籍にあるtipsを試す」です。
書籍は「iPhoneプログラミングUIKit詳解リファレンス 」です。 iPhoneアプリの開発するなら読んどく方が良い的な本。 Objective-CのソースはARCでないので、そのまま流用は辛いと思うのですが、UIKitに関する考え方を学ぶには一番分かりやすい日本語書籍だと思います。
今回はP.120の内容「Unit 4.1 フルスクリーン」の内容を実践。
まずはUIViewControllerを作って、空のUIViewを指定して背景を設定
using System;
using MonoTouch.UIKit;

namespace fullScreenApp
{
    public class FullScreenController : UIViewController
    {
        public FullScreenController ()
        {
            UIView view = new UIView (this.View.Frame);
            view.BackgroundColor = UIColor.White;
            this.View.AddSubview(view);
        }
    }
}

普通にUIViewControllerを動かすだけだとステータスバーが表示されます。
そこで、UIApplication.SharedApplication.SetStatusBarHiddenメソッドを呼んで、ステータスバーを外すだけ。
第1引数が表示するかしないかをBooleanで設定 第2引数はUIStatusBarAnimation の Enumを設定
| UIStatusBarAnimation | 意味 |
|---|---|
| UIStatusBarAnimation.None | アニメーションなし |
| UIStatusBarAnimation.Fad | フィードアウト・フィードイン |
| UIStatusBarAnimation.Slide | スライドイン・スライドアウト |
fullスクリーンにするとこんな感じです。
using System;
using MonoTouch.UIKit;

namespace fullScreenApp
{
    public class FullScreenController : UIViewController
    {
        public FullScreenController ()
        {
            UIApplication.SharedApplication.SetStatusBarHidden (true, UIStatusBarAnimation.None);
            UIView view = new UIView (this.View.Frame);
            view.BackgroundColor = UIColor.White;
            this.View.AddSubview(view);
        }
    }
}

ちなみに、new UIView (this.View.Frame);した後に、SetStatusBarHiddenすると、UIViewのサイズがステータスバーを考慮した状態のままなので注意ですね。 (そもそもこのソースのままだと横向きに対応していませんが。。。。)
今度の課題はリサイズの対応っぽいですね。同じく「iPhoneプログラミング UIKit詳細リファレンス」を参考に進めてみたいと思います。
今日はここまで。
ソースはgithubに。
UIViewを10000個重ねてグラデーションにしてみたら、起動に40秒かかってしまっった。
Xamarin Studio で弄り中。
width:100,height:10の四角形をループで10000個重ねて見たら、iOSシュミレータで起動に40秒くらい。なるほど。実機だと落ちます(ぁ
実機は2900くらい重ねると落ちました。

using System;
using MonoTouch.UIKit;
using System.Drawing;
namespace UIKitExample
{
    public class UIViewExample : UIViewController
    {

        public UIViewExample ()
        {
            RectangleF bounds = this.View.Frame;
            UIView uiview1 = new UIView (bounds);
            uiview1.BackgroundColor = new UIColor (0.8f, 0.0f, 0.1f, 0.8f);

            for (int i = 0; i < 10000; i++) {
                float x = 0.0f;
                float y = 0.0f;
                float width = 100.0f;
                float height = 10.0f;

                x = x + (float)i*0.01f;
                y = y + (float)i*0.01f;

                float red = 0.0f + ( ( float ) i * 0.0001f);
                float green = 0.0f;
                float blue = 0.0f;
                float alpha = 1.0f;
                UIColor color = new UIColor(red, green, blue, alpha);

                UIView uiview2 = new UIView ( new RectangleF(x,y,width,height));
                uiview2.BackgroundColor = color;
                uiview1.AddSubview(uiview2);
            }

            this.View.AddSubview(uiview1);
        }
    }
}
Xamarin StudioでiOSアプリ開発のチュートリアルをやってみた。
今日の朝チュートリアルは、tabbed_applicationsの作成。
詳細はコチラ
完成品はこんな感じ。


タブボタンを押すとUIViewが切り替わるという内容。 今回はemptyテンプレートからの作成で、xibやstoryboardは使いません。
emptyProject作成後に、新規クラスの作成 (ソリューションエクスプローラ>右クリック>追加>新しいファイル)

ファイル名は、「UITabBarController」
追加したファイルを編集。
usingを追加。MonoTouch.UIKitを読み込む。
using MonoTouch.UIKit;
TabBarControllerクラスはUITabBarControllerを継承するよう修正。
public class TabBarController: UITabBarController
{
}
AppDelegate.csを修正し、作成したTabBarControllerをwindow.RootViewControllerに設定。
public override bool FinishedLaunching (UIApplication app, NSDictionary options)
{
    window = new UIWindow (UIScreen.MainScreen.Bounds);

    //↓追加
    tabBarController = new TabBarController ();
    window.RootViewController = tabBarController;
    //↑追加

    window.MakeKeyAndVisible ();
    return true;
}
これでひとまず作成した、TabBarControllerが読み込まれる。 実行するとこんな画面。タブが表示されて画面真っ黒。

TabBarControllerにコンストラクタを追加
       //タブを押したときに表示されるUIViewControllerの変数をclass変数として持つ
        UIViewController tab1;

        public TabBarController ()
        {
            //UIViewControllerのインスタンスを生成してtab1に設定
            tab1 = new UIViewController();

            //UIViewControllerの背景を白に
            tab1.View.BackgroundColor = UIColor.White;

            //タブを配列にしてViewControllersに設定
            var tabs = new UIViewController { tab1 };
            this.ViewControllers = tabs;
        }
ViewControllersはUITabBarControllerのプロパティで、管理してるUIViewが入るのだと思います。 チュートリアルではthisを省略しているが、ここでは意味が分かるようにthisを追加しました。
これで実行すると、

これじゃ寂しいのでタブに日本語をつけてみます。
       //タブを押したときに表示されるUIViewControllerの変数をclass変数として持つ
        UIViewController tab1;

        public TabBarController ()
        {
            //UIViewControllerのインスタンスを生成してtab1に設定
            tab1 = new UIViewController();

            //UIViewControllerの背景を白に
            tab1.View.BackgroundColor = UIColor.White;

            //タブのタイトルを追加
            tab1.TabBarItem.Title = "日本語タブ";

            //タブを配列にしてViewControllersに設定
            var tabs = new UIViewController { tab1 };
            this.ViewControllers = tabs;
        }

ちなみに、tab1.TabBarItemに画像を入れたりシステムのタブにする場合は
下記のようにUITabBarItemインスタンスを作成して設定するイメージです。
//システムのコンタクトアイコンのボタンを利用
tab1.TabBarItem = new UITabBarItem(UITabBarSystemItem.Contacts, 0);

//タイトル文字と画像を設定する場合
tab1.TabBarItem = new UITabBarItem("title" , UIImage.FromFile("second.png"),0);


バッチをつける場合は、BadgeValueに文字列を設定。
tab1.TabBarItem.BadgeValue = "321";

こんな感じでタブを弄るみたいです。